For VM Management in UPONSCALE, you have to go to Convergence ⇒ Virtual Machines.
Turning the VM on/off #
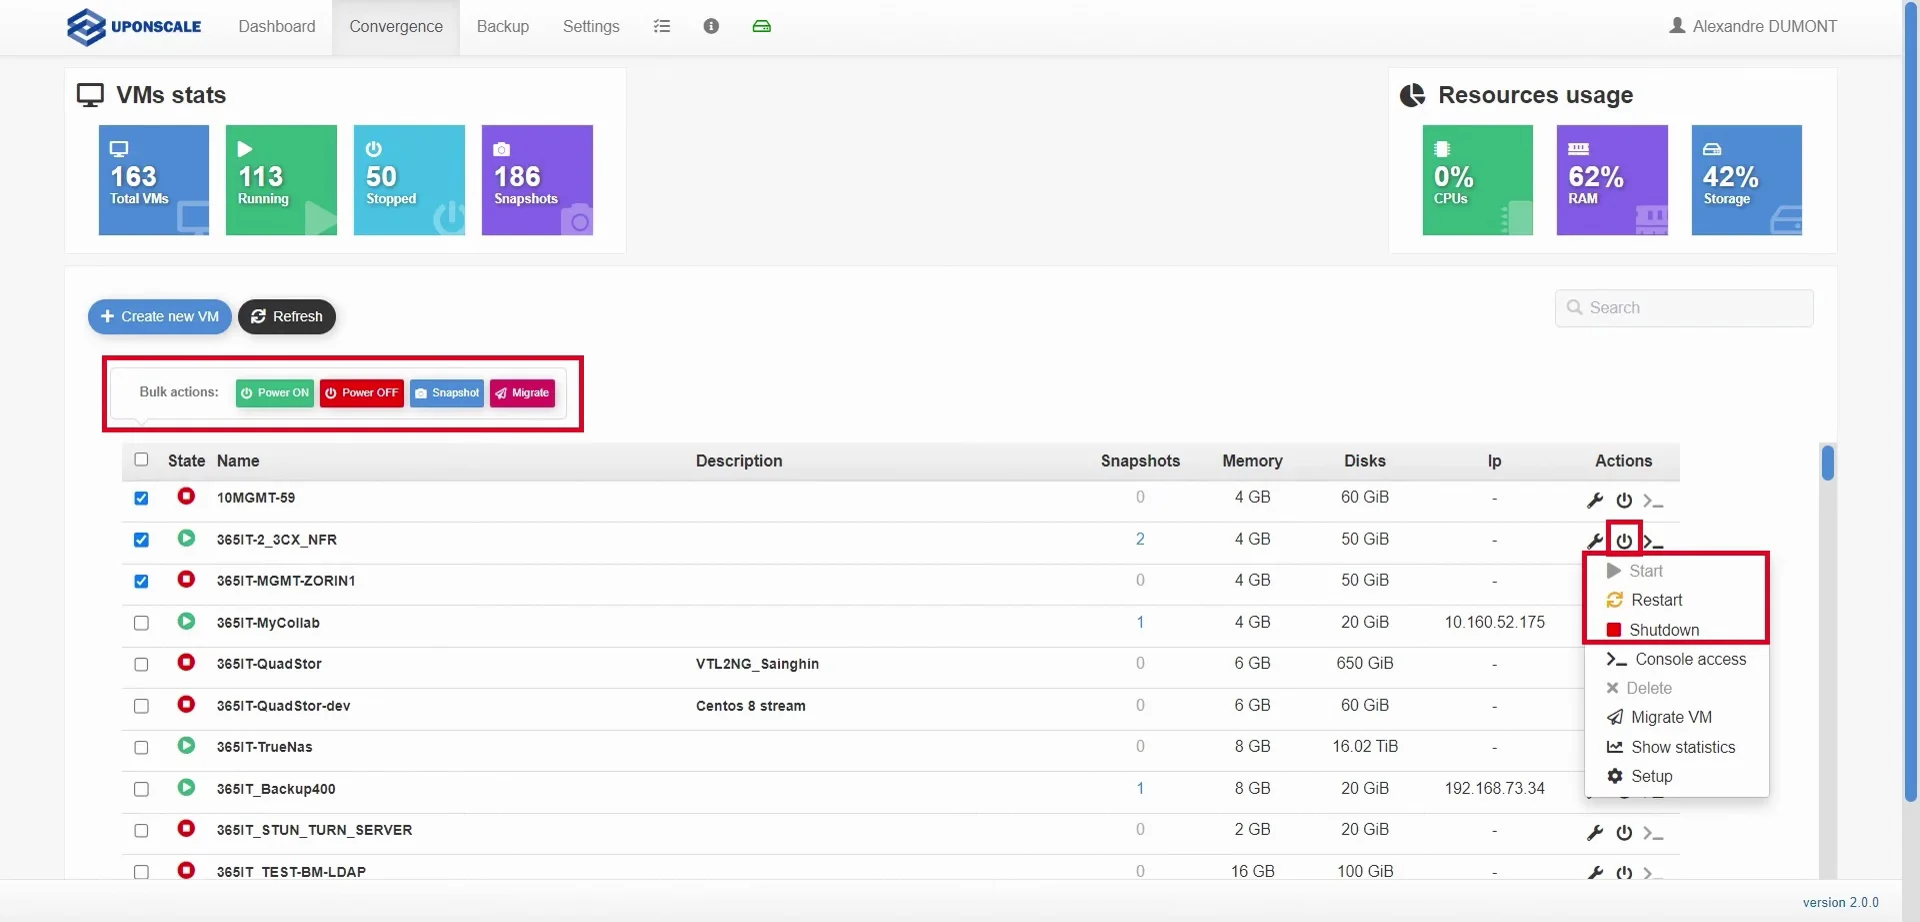
In the VM catalog, click on the power button to start or shutdown the VM.
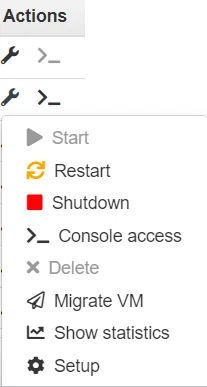
You can also do it in the Action menu (which you can access by clicking on the wrench icon on the left of the power button) and clicking on the desired option or from the setting tab described in VM CUSTOMIZATION : SYSTEM.
You can make bulk actions by selecting the VMs and picking an action on top of the VM gallery.
VM customization #
In the Virtual Machine catalog, in order to modify a Virtual Machine click on the row of the Virtual Machine you wish to change. A popup will appear where you can set up your Virtual Machine.
INFO #
Only storage and disk modification can be modified while a Virtual Machine is running
System (CPU, RAM, …) #
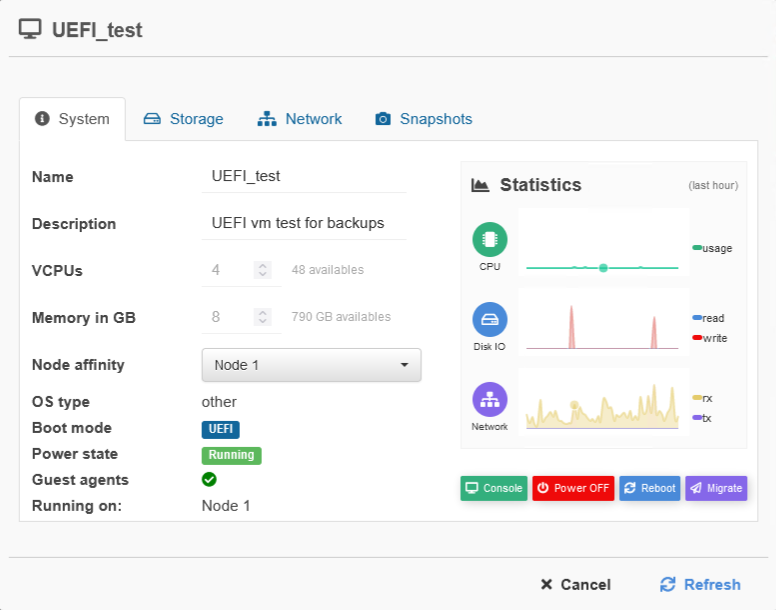
From the system tab, you can update :
- – The name and
description - – The VCPUs
- – The memory
- – The node affinity.
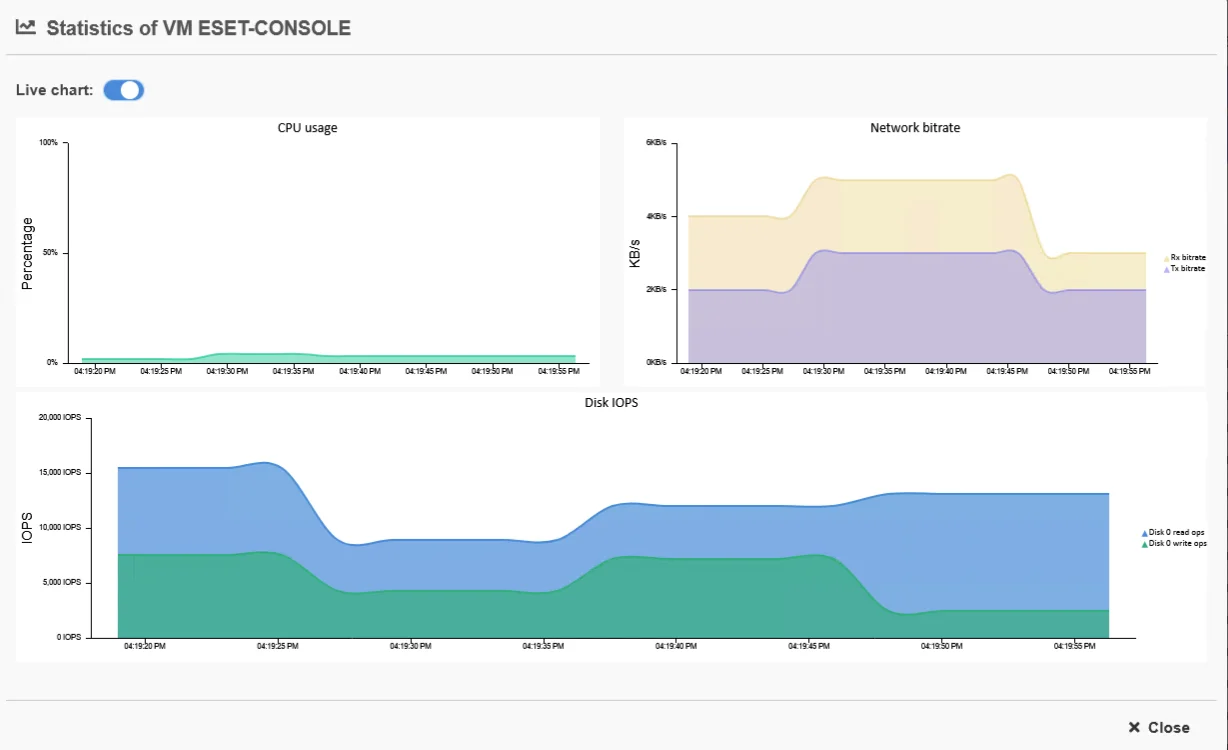
You can also see the OS type, boot mode, power state and the CPU, Disk IO and network statistics of the Virtual Machine.
Storage #
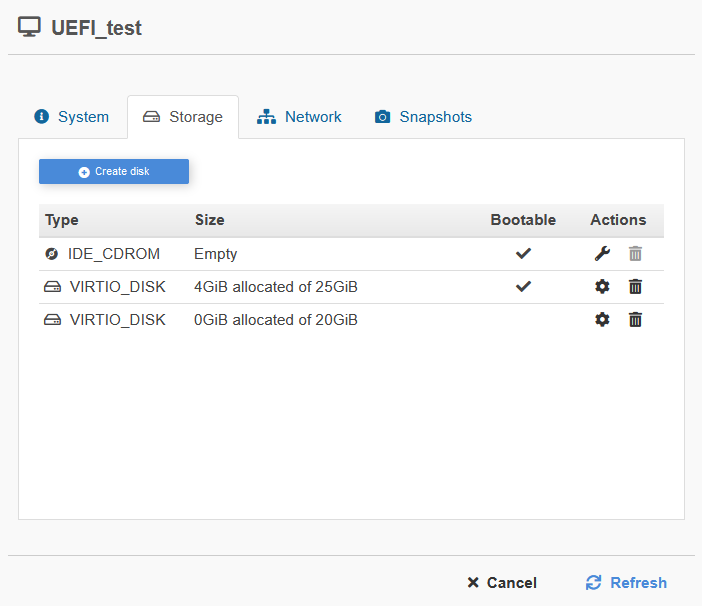
From the Storage tab, you can manage the disks of the Virtual Machine.
Disks settings #
To change the settings of a disk, click on the cog in the Actions column, then you will be able to modify :
- – The disk type
- – The cache mode (between writethrough, writeback and none)
- – The disk size
- – The disk priority.
Warning #
Only the Super-administator and modify the disk priority.
Only increase or decrease the disk priority by one each day to avoid any technical issue.
Modifying the CDROM’s ISO #
To modify the CDROM, click on the wrench icon in actions and then select the desired ISO and save.
Creating a new disk #
After clicking on the create disk button, you will need to input the following settings in the “add VM disk” popup before you add the disk:
- – The disk type
- – The cache mode (between writethrough, writeback and none)
- – The disk size
- – The disk priority (only the super admin can modify the priority)
Network #
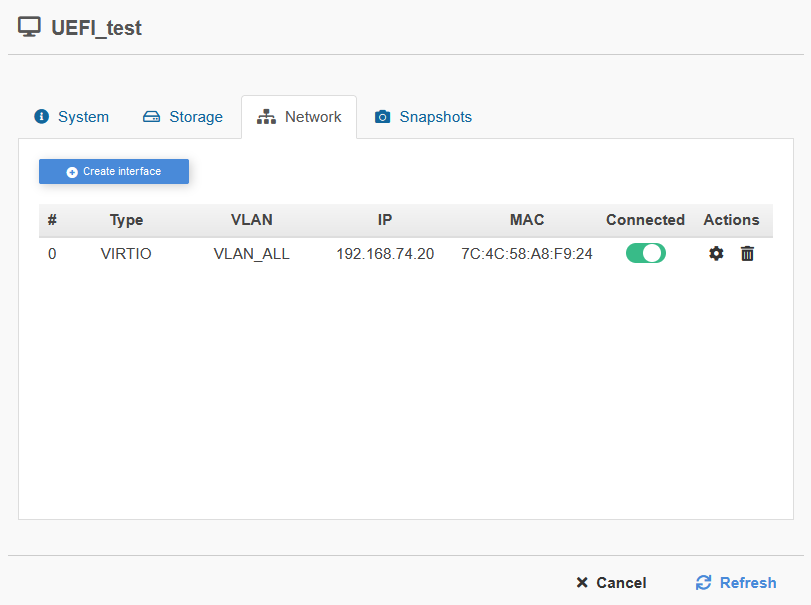
From the Network tab, you can manage the Network interfaces of the Virtual machine.
Network/interface settings #
To change the settings of a network, click on the cog icon in the Actions column, then you will be able to change :
- – The network/interface type
- – The MAC address
- – The VLAN.
Connecting to an interface #
In the connected column, you can click on a switch to connect or disconnect your virtual machine from the network.
Creating a new interface #
After clicking on the create interface button, enter the following settings in the “create interface” popup before you save:
- – The network/interface type
- – The MAC address
- – The VLAN.
Snapshot #
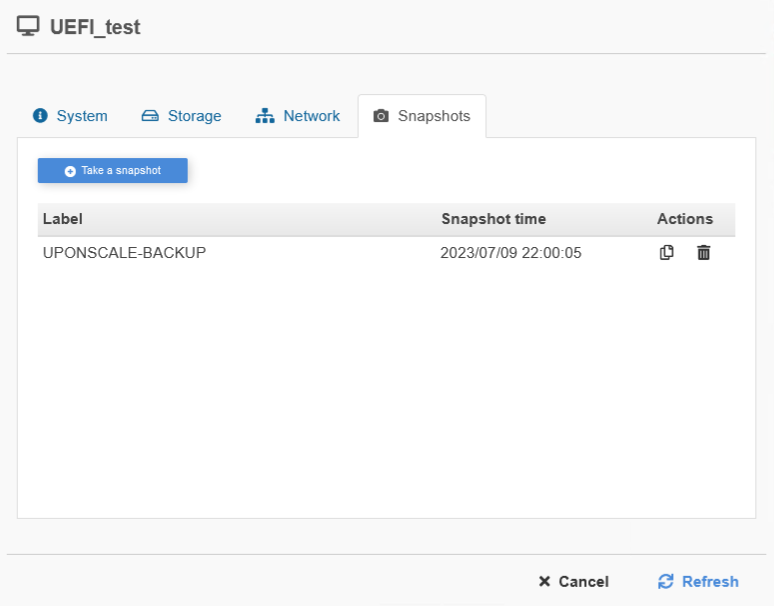
From the snapshot tab, you can manage all the snapshots of the virtual machine.
Take a snapshot #
Click on the “take a snapshot” button, name the snapshot and confirm the action.
Clone the snapshot to a new VM #
Click on the file icon in the action column, a popup will appear where you need to enter the name, description and the cloneif it keeps the MAC
Click on the file icon in the action column, a popup will appear where you need to enter :
- – The name
- – The description
- – keeps the original MAC
address if needed
Deleting the snapshot #
Click on the trash bin icon in the action column, then confirm your action in the popup.
VM migration #
To migrate a virtual machine, click on the action menu then on the “migrate VM” option.
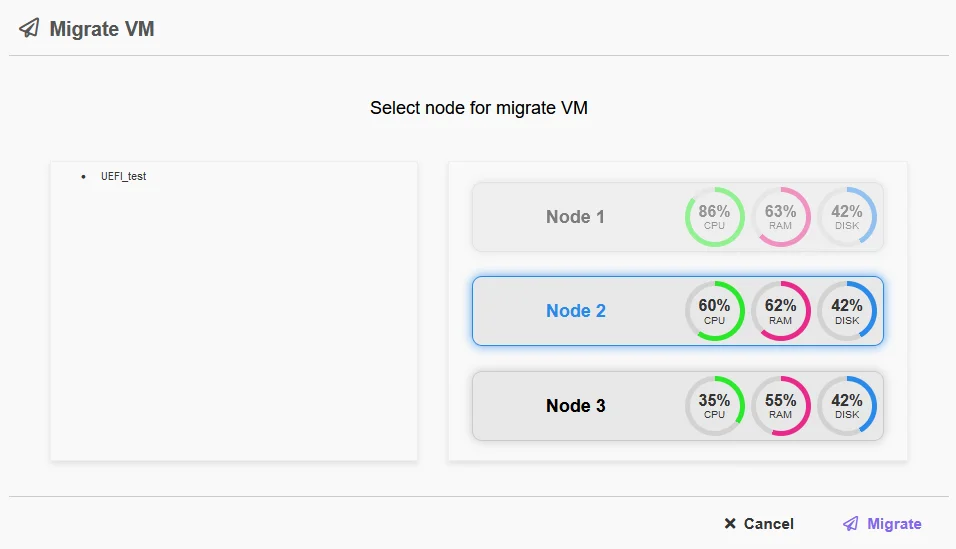
In the “Migrate VM” popup, select the node you wish to migrate your virtual machine to and confirm by clicking on “Migrate”
Reading stats #
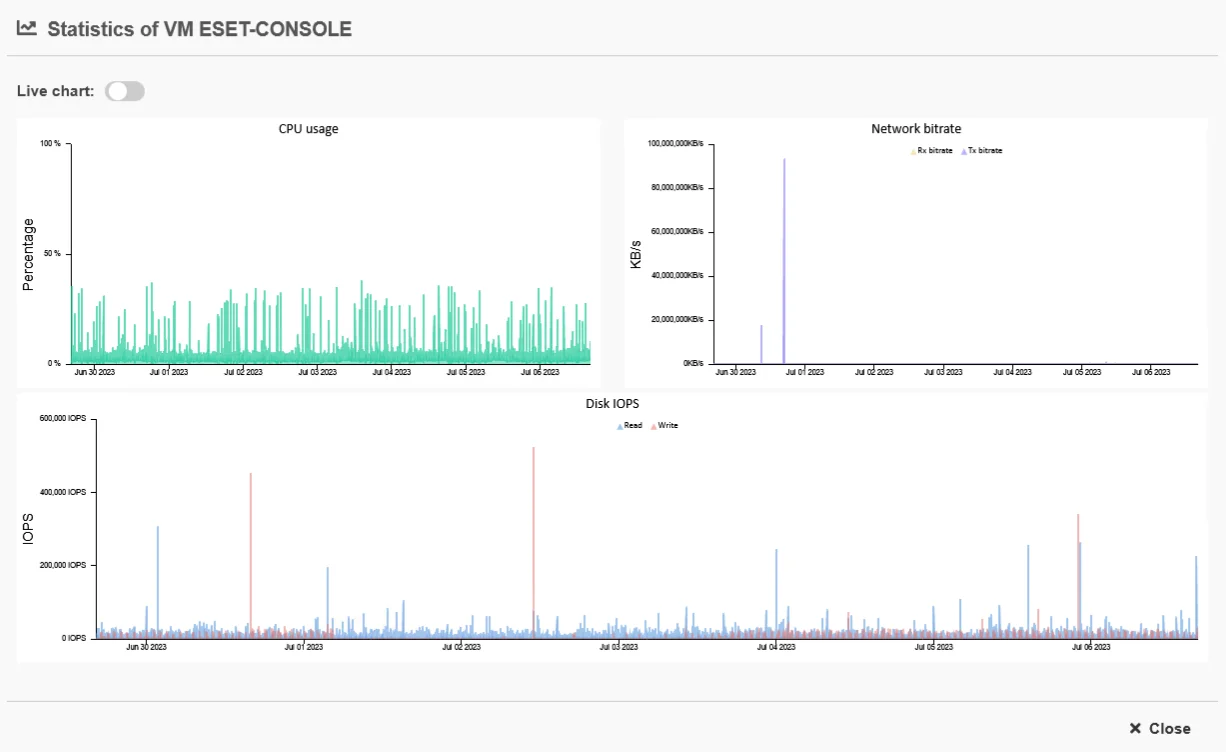
On the system tab click on the statistics charts to access the virtual machine’s stats.
From the statistics popup, you’ll be able to see:
- – CPU usage,
- – Network’s Bitrate,
- –
Disk
By default, you’ll see the static stats, to switch to live statistics turn the “Live Chart” switch on, to return to static statistics turn the switch off.
